How to install the Qualzz tracking code in WordPress enabled sites
You need to install the tracking code in your WordPress website to run the campaigns. For tracking code installation, you have to follow these simple steps:
- Log in to your Qualzz Account
- You find the Tracking Code Button beside Company & Website view in the Business settings page
![]()
- Click on the tracking code button, a page with code is displayed.
- Either select the code and press right-click to copy or simply click on the “copy to clipboard” button beside the code.
![]()
Next, login into your WordPress website admin account page
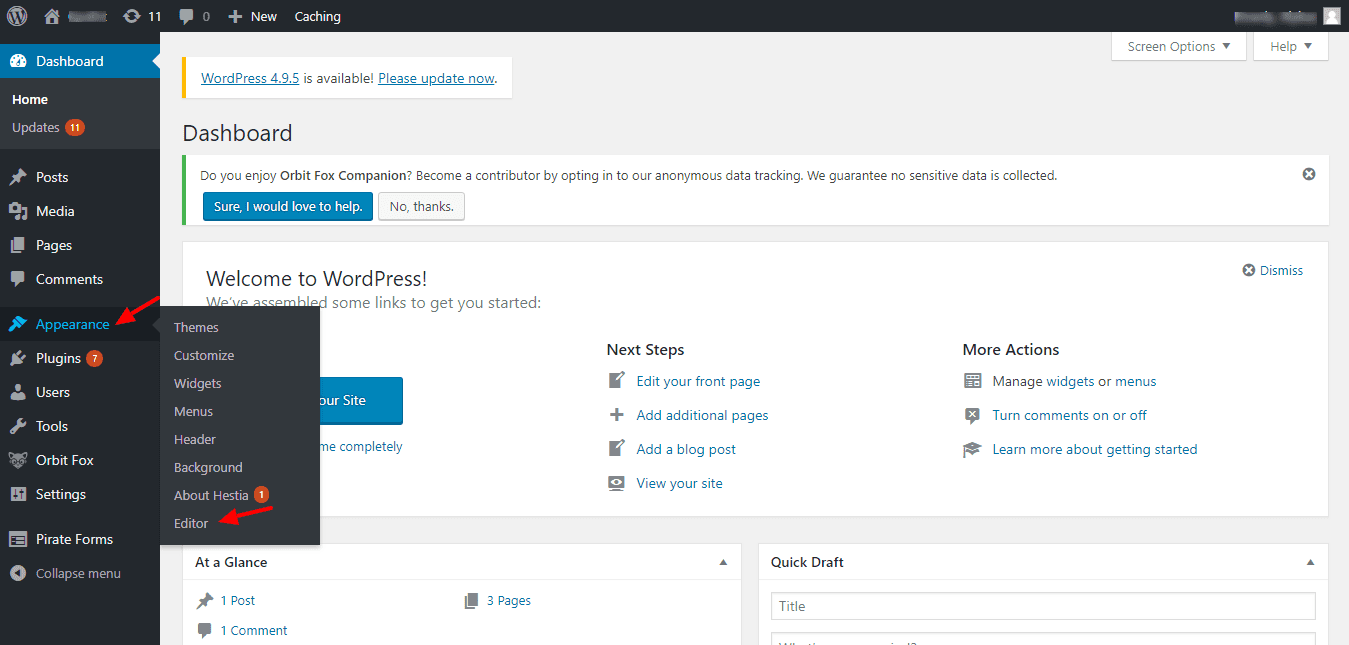
- From the WordPress admin, click Appearance > Editor

- When clicked on Editor, a themes page is opened
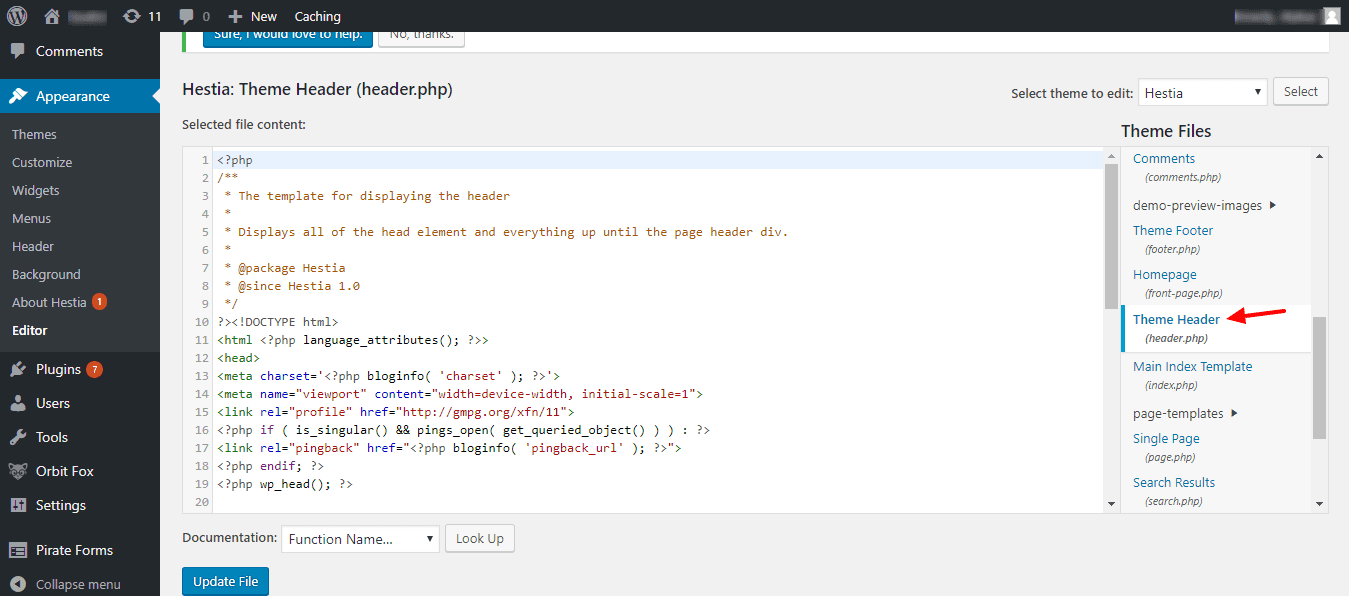
- On the right-hand side, under the Templates heading, scroll down and find Theme Header, Click on Theme Header.

- Scroll to the bottom of the file and paste the Qualzz code from your account into your website’s footer just before the <body> tag.
![]()
- Click Update File.
- Now, the tracking code is successfully placed on the WordPress website.
- Create a campaign and activate it to see the pop-up’s working.
If you need any further assistance, don’t hesitate to contact us.
