How to use Qualzz’s Geo-targeting for advanced level targeting
Qualzz makes it seamless to target campaign popups to website visitors based on their physical location like City & Country. Using this feature we can make the campaign highly targeted to yield better conversion rates.
In this article, you will learn how to trigger the campaigns to a particular location using the geo-targeting options.
To add geo-targeting options to your campaign, follow these steps:
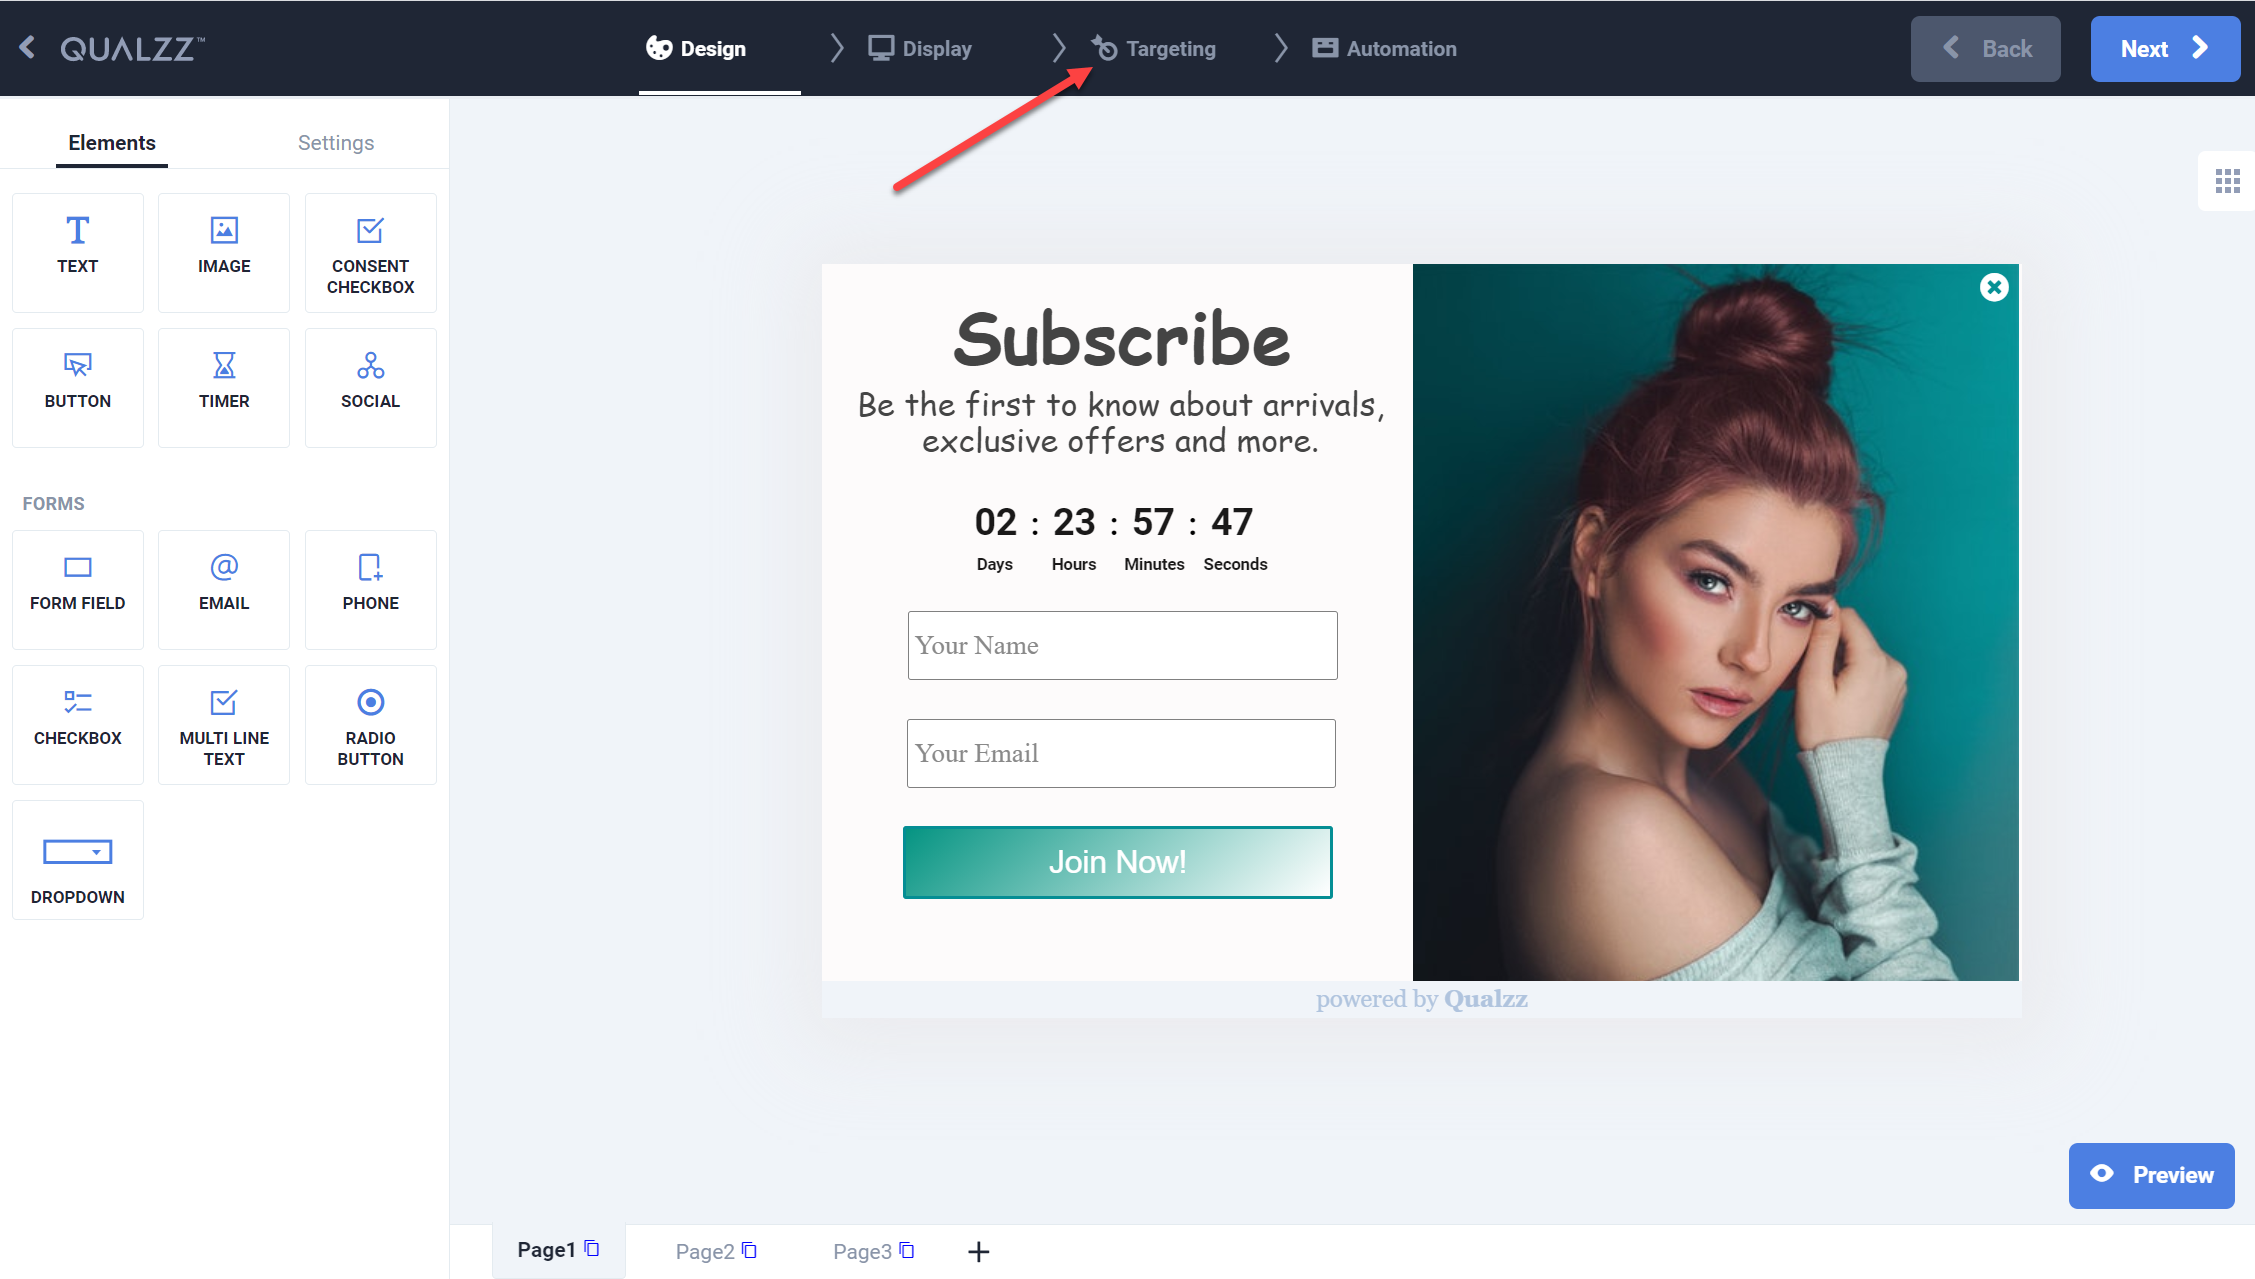
- Select the “Targeting” view from the popup campaign builder

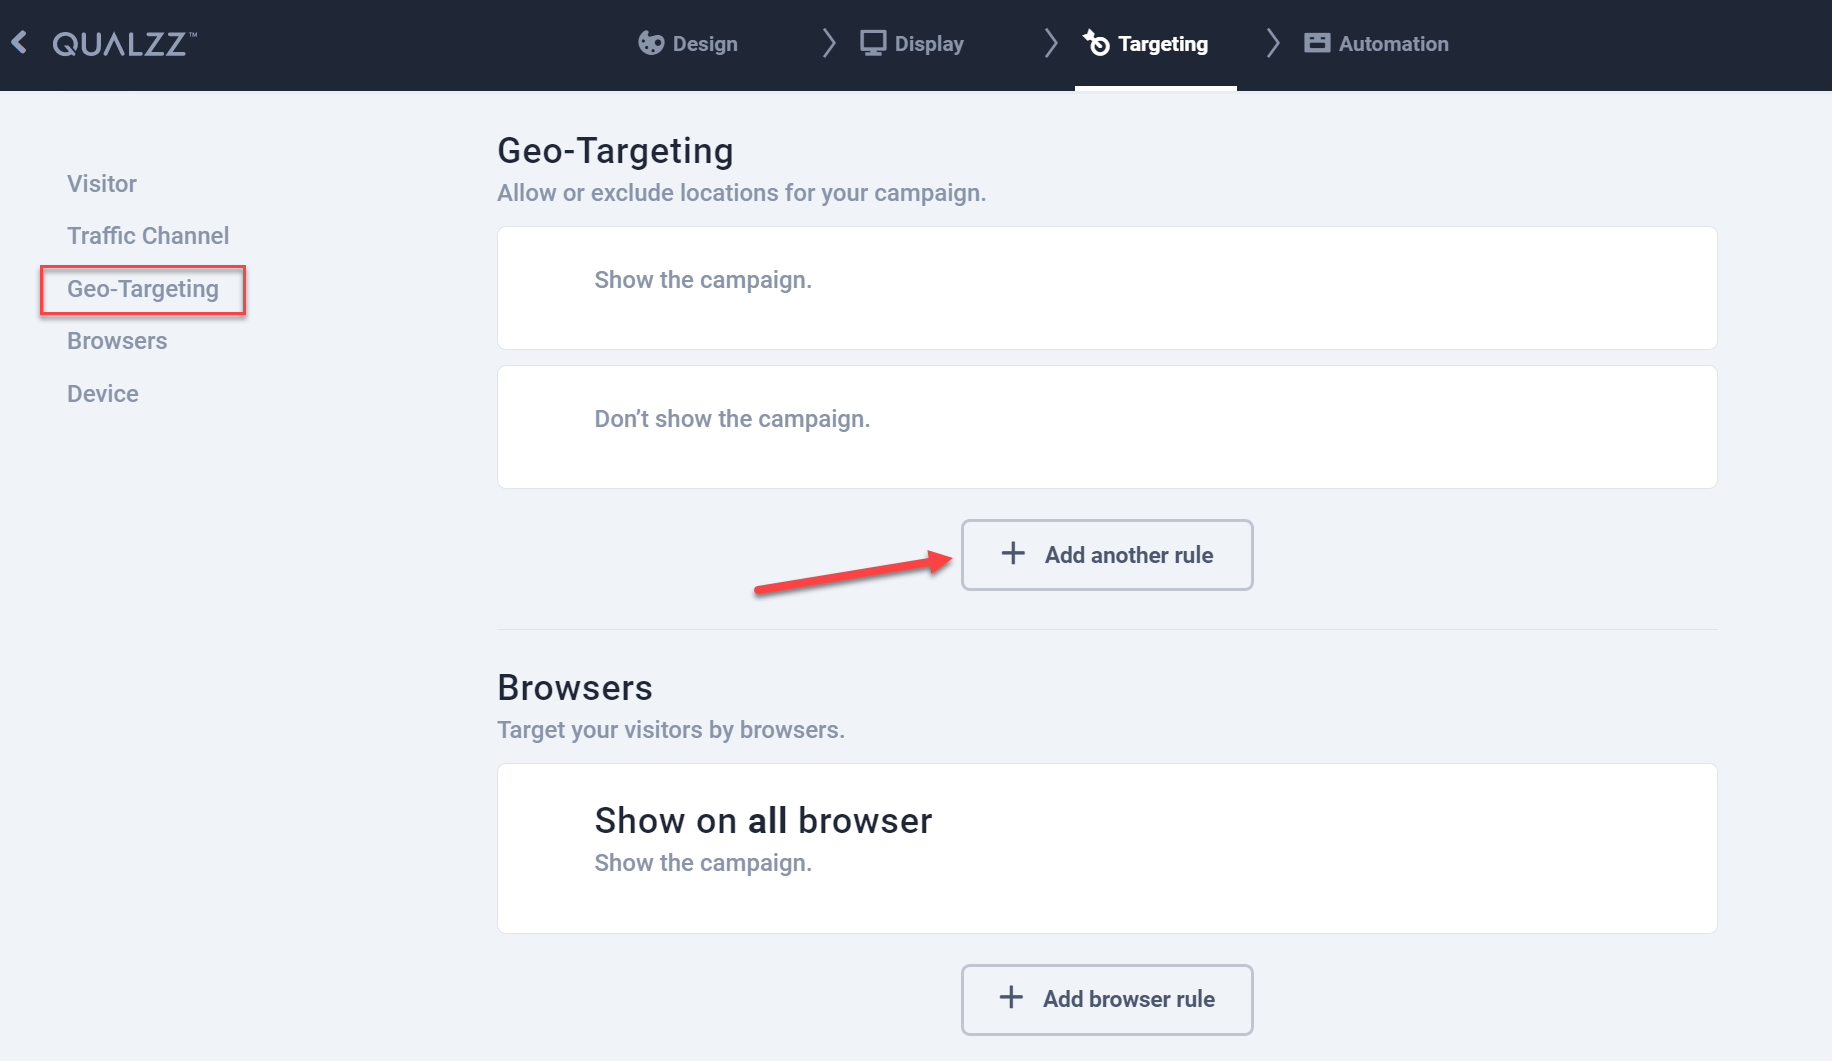
- Select the Geo-Targeting option on the left panel of the Targeting view
- Click on the button “Add another rule”, to open the Targeted locations view

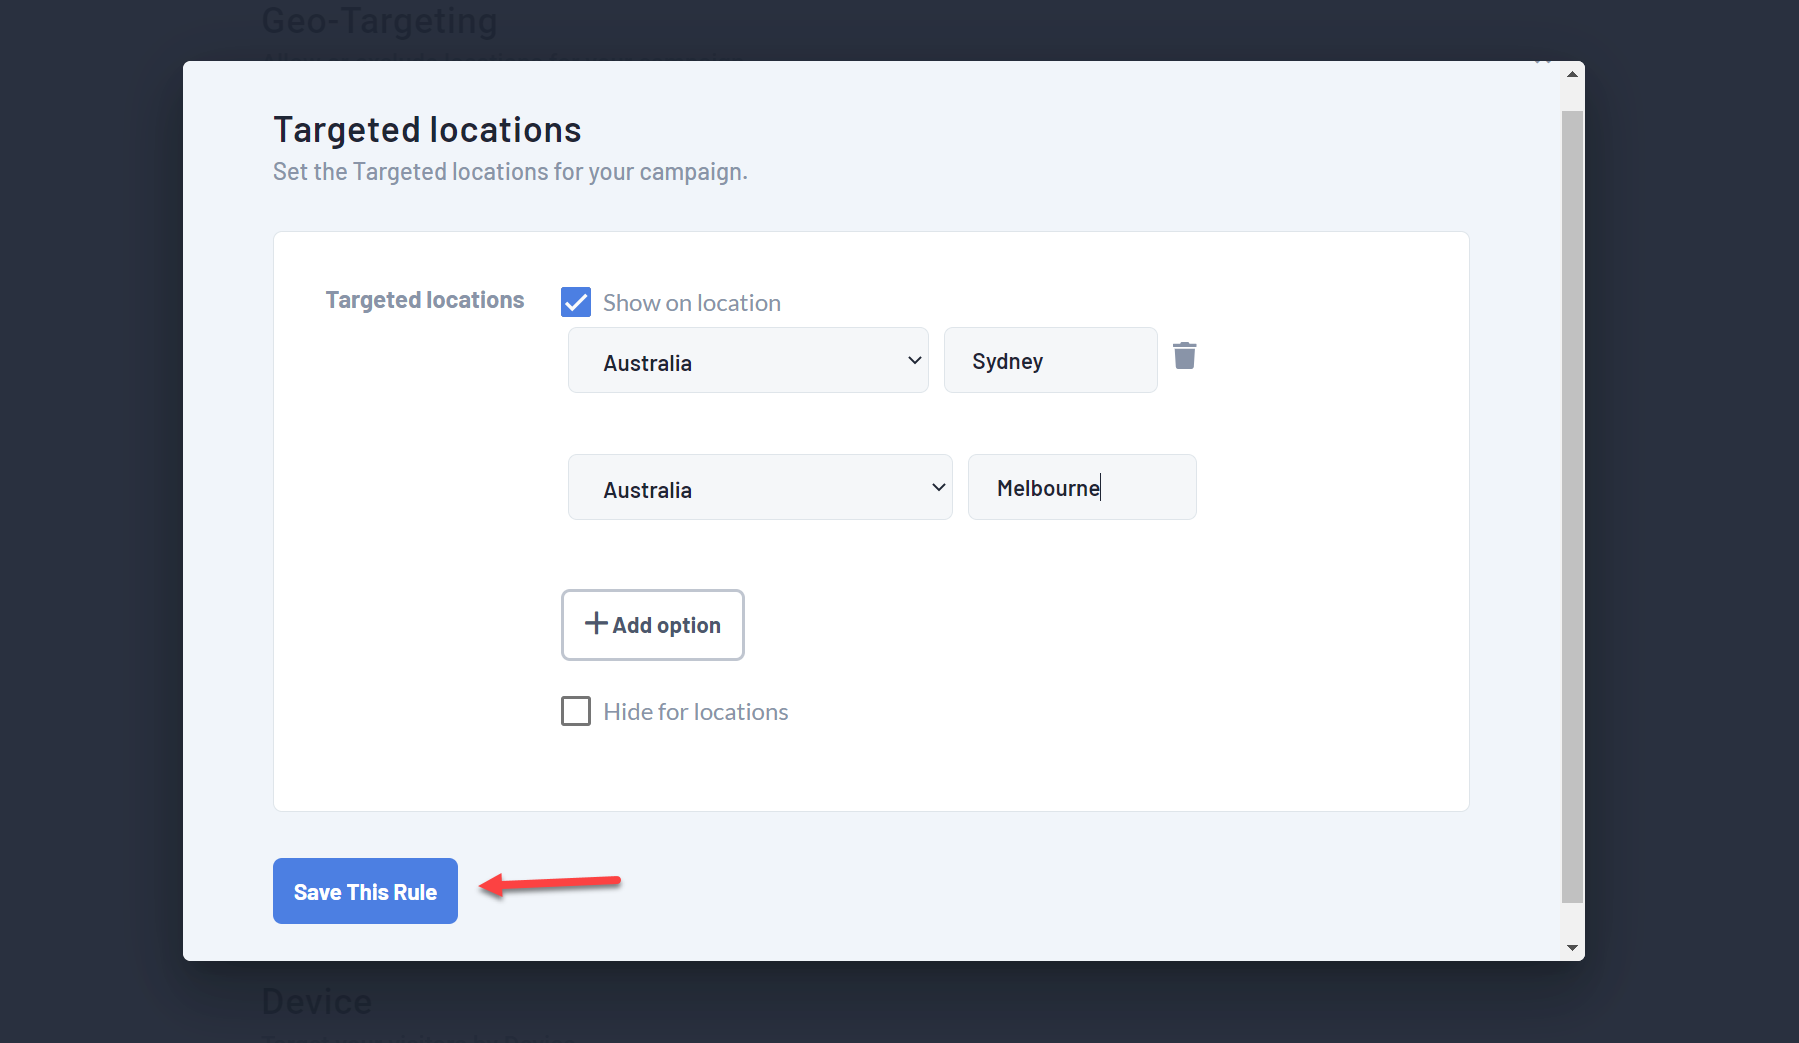
- The view displays options to “Show for locations” and “Hide for locations”
- Select the relevant check box to display the options to add the country and the city, you can add multiple options by clicking on “add option”

- To maintain entries, select the country from the dropdown and enter the city name
- Add new entries or delete the existing location entries
- when you are finished, click the button “Save this rule”
